
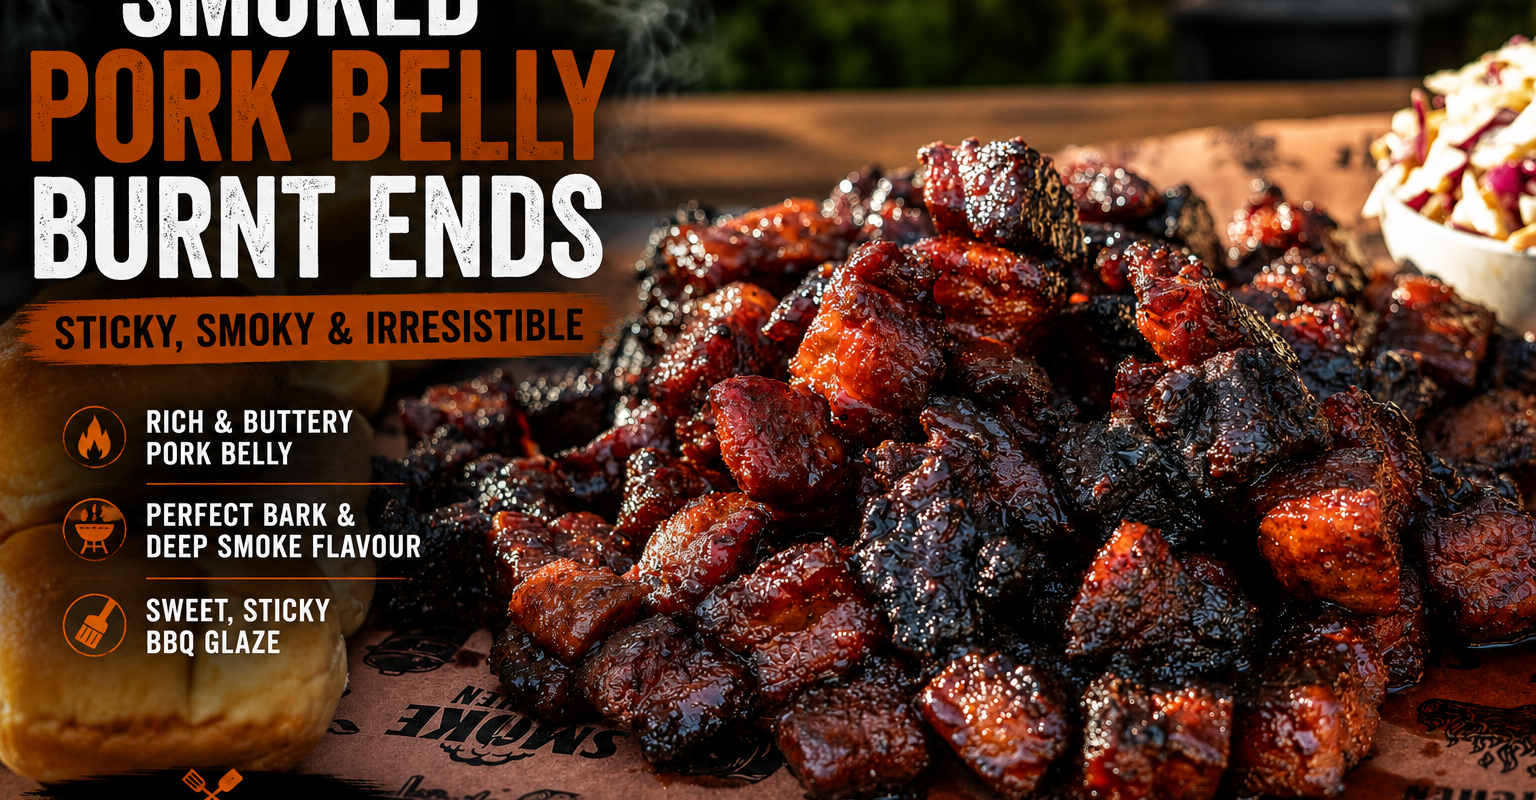
Brisket burnt ends might get all the attention, but pork belly burnt ends are far easier to cook consistently at home and, in many cases, even more satisfying to eat.
The combination of rendered pork fat, dark bark, smoke, and sticky glaze creates something that sits somewhere between proper barbecue and meat candy.
When cooked correctly, each cube should have:
- a dark caramelised exterior
- soft rendered fat
- buttery texture through the centre
- enough structure to hold together when picked up
Most disappointing pork belly burnt ends fail for one of three reasons:
- the fat never fully renders
- the bark turns soft after wrapping
- the glaze burns before the pork finishes cooking
This method avoids all three problems.
Instead of rushing straight into a sugary wrap, the pork spends enough time uncovered to properly develop bark first. That bark becomes the foundation for everything that happens later in the cook.
The result is sticky, smoky pork belly with deep barbecue flavour and a rich texture that works brilliantly on its own, piled into brioche buns, or served alongside pickles and slaw.
Why This Method Works
| Technique | Why It Matters |
| Cubing before smoking | Creates more surface area for bark formation |
| Low initial smoking temperature | Allows smoke adhesion before fat fully renders |
| Spritzing during the cook | Prevents dry patches and helps bark develop evenly |
| Wrapping later in the cook | Protects bark texture whilst accelerating rendering |
| Finishing uncovered | Thickens and caramelises the glaze |
What You Need
Pork Belly
Look for skinless pork belly with a balanced meat-to-fat ratio.
Too lean and the burnt ends lose their buttery texture.
Too fatty and they can become overly rich without enough meat structure.
The centre section of the belly usually gives the best balance.
For most cooks, a 4 to 5lb slab is ideal and comfortably feeds 6 to 8 people.
If you are buying from Costco, a butcher, or online meat supplier, try to avoid thin tapered ends where possible as they cook much faster than the thicker centre pieces.
BBQ Rub
A pork rub with:
- sweetness
- salt
- paprika
- pepper
- garlic
- mild heat
works best here.
Pork belly can handle aggressive seasoning because of its fat content.
The sugar in the rub also helps develop the dark lacquered bark during the smoking phase.
Binder
Yellow mustard works perfectly.
You will not taste it once cooked.
Its main purpose is helping the seasoning stick evenly across every cube.
Hot sauce also works well if you want a little more background heat.
Spritz
I prefer a mix of:
- apple cider vinegar
- water
Some people use apple juice, but pure juice can darken the bark too quickly because of the extra sugar content.
The spritz helps slow surface drying during the bark-building stage.
Wrap Ingredients
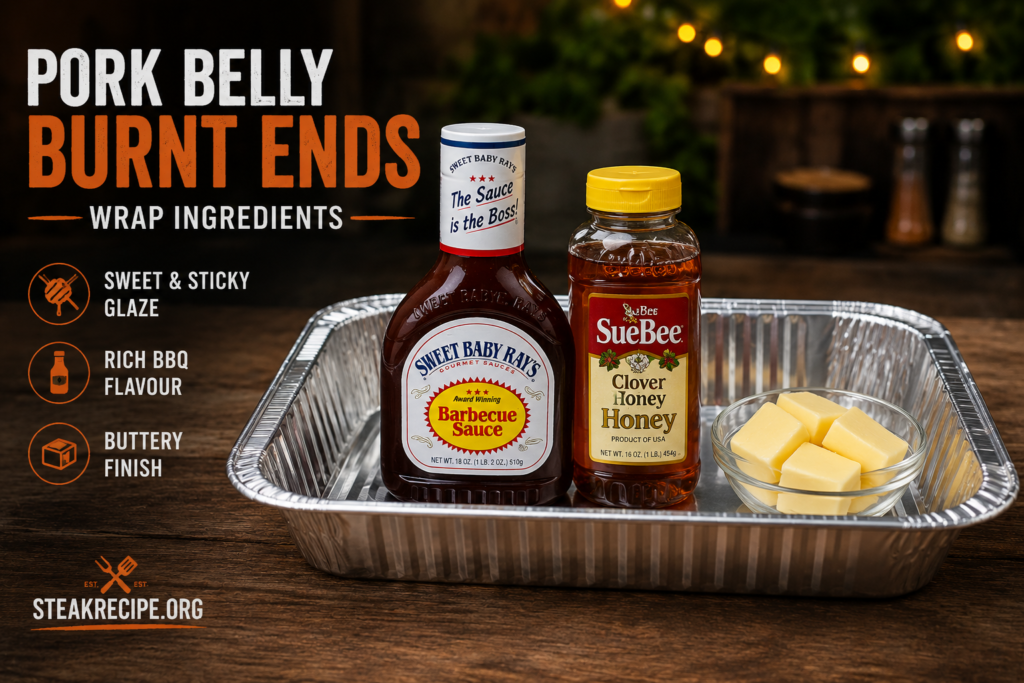
For the wrap stage you need:
- butter
- honey
- barbecue sauce
This combination creates the sticky glaze that makes burnt ends so addictive.
Hot honey works brilliantly if you want extra heat.
A splash of bourbon also works well with pork belly.
What Makes Pork Belly Perfect for Burnt Ends?
Pork belly contains:
- intramuscular fat
- connective tissue
- collagen
which slowly breaks down during low temperature cooking.
As the fat renders, it bastes the meat internally whilst the outer layer caramelises from the rub, smoke, and sugars.
Cubing the pork before cooking dramatically increases surface area.
That means:
- more bark
- more caramelisation
- more smoke exposure
- better texture contrast
This is why pork belly burnt ends often develop stronger bark than traditional brisket burnt ends.
Best Wood for Pork Belly Burnt Ends
Fruit woods work exceptionally well with pork.
My favourites are:
- cherry
- apple
- pecan
Cherry produces a darker colour and slightly sweeter smoke profile.
Apple gives a milder smoke flavour that works well for beginners.
If you prefer stronger barbecue flavour, blending oak with cherry gives excellent results.
Hickory also works, although too much can overpower pork belly quickly.
Pellet Smoker vs Charcoal Smoker
Both work well.
Pellet smokers:
- provide easier temperature control
- produce cleaner smoke
- suit beginners better
Charcoal smokers:
- usually create stronger smoke flavour
- develop slightly more aggressive bark
- require more fire management
This recipe works on:
- pellet grills
- drum smokers
- kamado cookers
- offset smokers
The cooking technique matters more than the cooker itself.
Smoker Setup
Preheat your smoker to 250°F.
This temperature gives enough time for smoke adhesion and bark development before the fat fully renders.
Running hotter too early can soften the bark before it properly forms.
If using a pellet smoker, allow the cooker to stabilise fully before adding the pork.
Clean smoke matters here.
Heavy dirty smoke can make pork belly taste bitter surprisingly quickly because of the fat content.
Step 1: Cube the Pork Belly
Slice the pork belly into roughly 1.5 inch cubes.
You do not need absolute precision, but keeping the cubes relatively uniform helps everything cook evenly.
Smaller cubes:
- cook faster
- develop more bark
- render more quickly
Larger cubes:
- stay softer internally
- take longer to finish
- produce a meatier texture
I prefer slightly larger cubes because the extra internal softness balances the bark better.
A sharp slicing knife makes a huge difference here.
Cold pork belly is also much easier to cut cleanly than warm pork belly.
Step 2: Season the Pork
Place the cubes into a tray or large bowl.
Apply mustard lightly across the pork and toss thoroughly.
Next apply your rub generously.
Pork belly can take far more seasoning than lean cuts like pork loin because the rendered fat softens the overall flavour during cooking.
Make sure every surface is coated.
The edges especially matter because they develop the darkest bark.
If any cubes look patchy, hit them with another light dusting before they go onto the smoker.
Step 3: Build the Bark
Arrange the cubes directly on wire racks or grill grates with space between each piece.
Airflow matters.
Crowding the pork too tightly traps steam and slows bark formation.
Place the pork belly into the smoker and cook at 250°F for around three hours.
Spritz lightly every 45 to 60 minutes whenever the surface starts looking dry.
Do not overdo the spritzing.
Too much liquid can soften the bark before it sets.
What Proper Bark Should Look Like
After roughly three hours:
- the surface should look dark mahogany
- edges should feel tacky rather than wet
- rendered fat should appear glossy
- seasoning should no longer look powdery
This stage matters more than exact timing.
If the bark is still pale, keep cooking uncovered longer.
Wrapping too early is one of the biggest mistakes people make with pork belly burnt ends.
Why Bark Formation Matters
Bark forms through:
- dehydration
- smoke adhesion
- rendered fat
- seasoning caramelisation
- Maillard reaction
Without enough uncovered cooking time, the exterior stays soft instead of developing texture.
Once wrapped, bark development slows dramatically because of the increased moisture inside the tray.
That is why the uncovered stage is so important.
Step 4: Wrap and Render
Transfer the pork belly cubes into foil trays.
Add:
- butter
- honey
- barbecue sauce
Toss lightly until coated.
Cover tightly with foil and place back onto the smoker.
At this stage you can increase temperature slightly to around 275°F.
The higher heat accelerates rendering without hurting bark because the pork is now protected inside the tray.
Cook for roughly another hour.
Texture Checkpoint
The pork belly is ready when:
- the cubes feel soft when squeezed gently
- fat looks translucent
- internal temperature sits around 203°F to 205°F
- the glaze coats the meat instead of pooling heavily
If the fat still looks solid white, it has not rendered fully yet.
Give it more time.
Underrendered pork belly feels chewy rather than buttery.
Step 5: Finish Uncovered
Remove the foil and return the tray uncovered for another 15 to 20 minutes.
This final stage thickens the glaze and tightens the bark slightly.
Watch carefully here.
The sugars can burn quickly once uncovered.
You want:
- sticky glaze
- dark edges
- glossy finish
not burnt sugar.
Common Mistakes That Ruin Pork Belly Burnt Ends
Wrapping Too Early
This softens the bark before it fully develops.
Always prioritise bark colour and texture over cooking time.
Running Too Hot Early
High heat renders fat too quickly and can create greasy burnt ends without enough bark structure.
Oversaucing
Too much sauce masks the smoke flavour and creates overly sweet burnt ends.
The glaze should complement the pork, not drown it.
Poor Smoke Quality
Dirty smoke creates bitter pork belly very quickly.
Thin blue smoke always produces better flavour.
Timing Guide
| Stage | Temperature | Approx Time | Goal |
| Bark Formation | 250°F | 3 Hours | Develop smoke and bark |
| Wrap Stage | 275°F | 1 Hour | Render fat and soften |
| Finish Stage | 275°F | 20 Minutes | Tighten glaze |
How to Serve Pork Belly Burnt Ends
These work brilliantly served straight from the tray with toothpicks for parties and gatherings.
For something more substantial, pile them into:
- brioche buns
- potato rolls
- tacos
Fresh slaw helps cut through the richness.
Pickles also work exceptionally well because the acidity balances the rendered pork fat.
Final Thoughts
Good pork belly burnt ends should feel rich without becoming heavy.
The bark should provide texture.
The glaze should cling rather than drip.
Most importantly, the fat should render fully enough that every bite feels soft and silky rather than chewy.
Once you understand how bark formation and fat rendering work together, pork belly burnt ends become one of the most reliable and rewarding cooks you can make on a smoker.